
Knowledge base > How to create Room Plan and Rate Plan on Zleeper
How to Create Room Plan and Rate Plan on Zleeper
Managing your pricing correctly is one of the most important parts of running a hotel, villa, or motel. In Zleeper, pricing is divided into two key components:
- Room Plan
- Rate Plan
Understanding the difference between these two will help you sell the same room in multiple ways — without duplicating inventory.
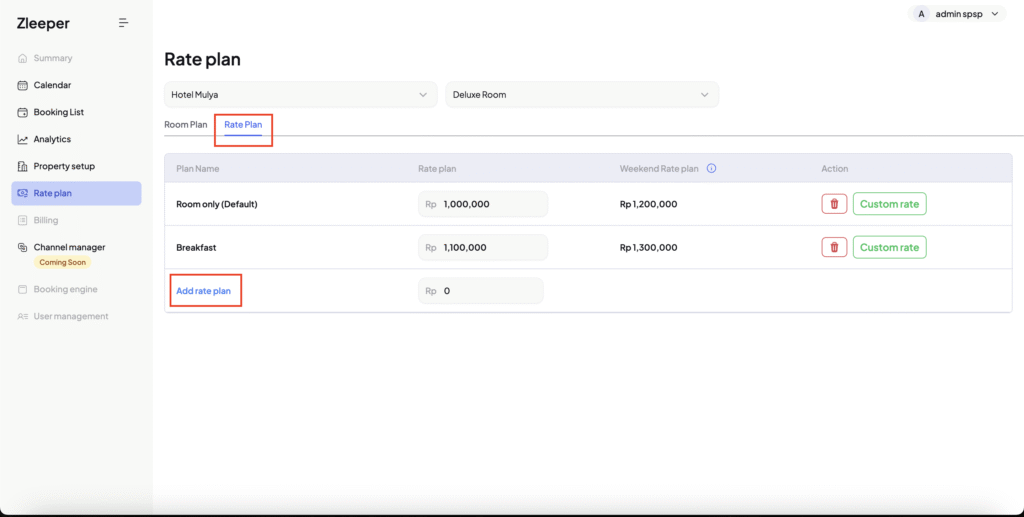
What is a Rate Plan?
A Rate Plan allows you to sell the same room type at different prices based on inclusions.
For example:
You have:
- 1 room type → Deluxe Room
- 1 room → Deluxe Room 001
But you want to sell it as:
- Room Only → $20
- Breakfast Included → $25
- Dinner Included → $30
You only have one room. How can you sell it in different packages?
👉 The answer is Rate Plan.
Rate Plans allow you to:
- Add value-added packages
- Adjust pricing based on inclusions
- Sell multiple pricing options under the same room inventory
This is essential if you want to:
- Maximize revenue
- Upsell meals or services
- Provide flexible booking options
Before You Start
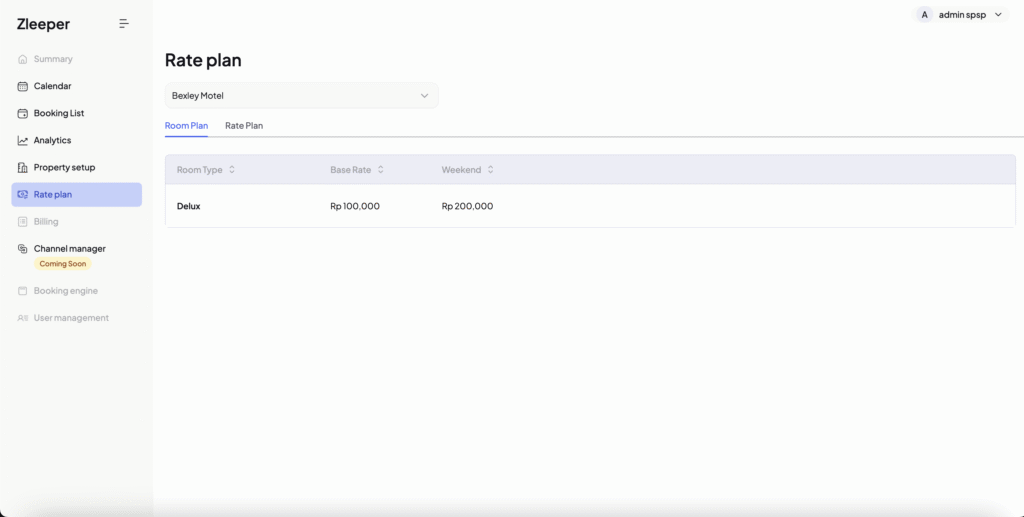
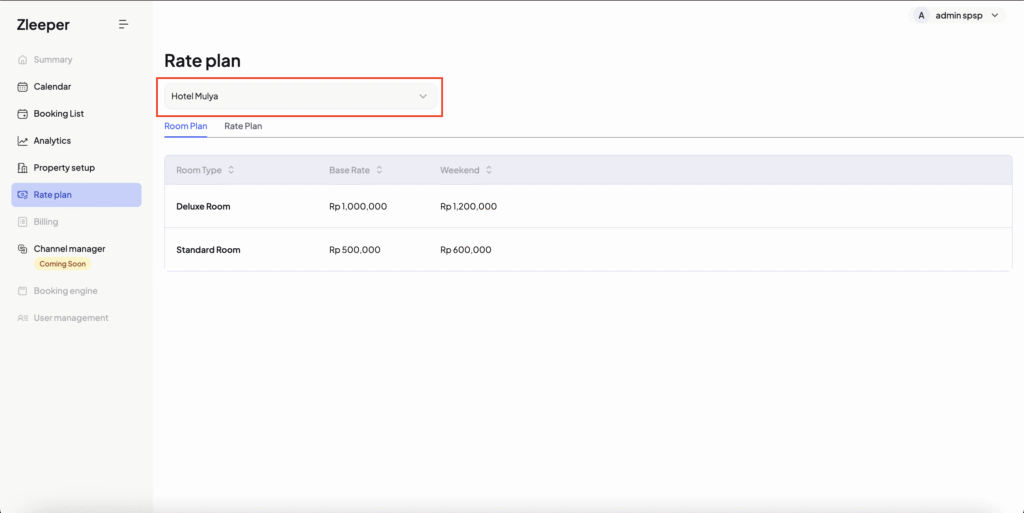
At the top of the Rate Plan page, make sure you select the correct property.
Zleeper allows you to manage multiple properties under the same account.
If you only have one property, you can proceed directly.
Always double-check the property dropdown before making pricing changes.
Room Plan (Foundation of Your Pricing)
Base Rate
Base rate of your room plan is the default room-only price for your room type.
Example:
Deluxe Room → $20
This becomes the starting point of your pricing structure.
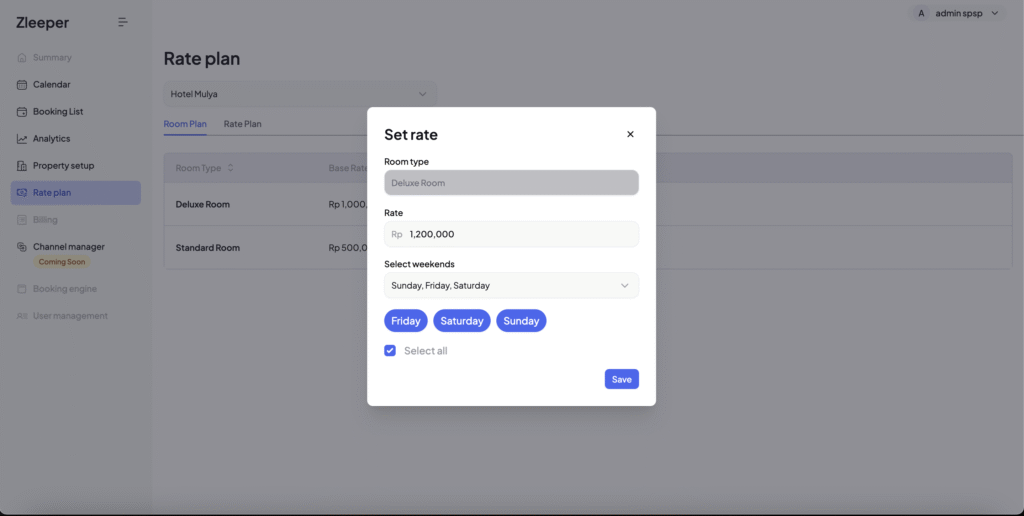
Weekend Rate
Weekend rate applies to any of these days:
- Friday
- Saturday
- Sunday
This allows you to automatically increase price during high-demand days.
Example:
- Base Rate: $20
- Weekend Rate: $25
Now your room automatically costs:
- $20 on weekdays
- $25 on weekends
This is the pricing foundation that your Rate Plans will reference.
Rate Plan (Advanced Pricing Structure)
The Rate Plan tab allows you to create multiple pricing options for the same room type.
This is slightly more advanced, so please read carefully.
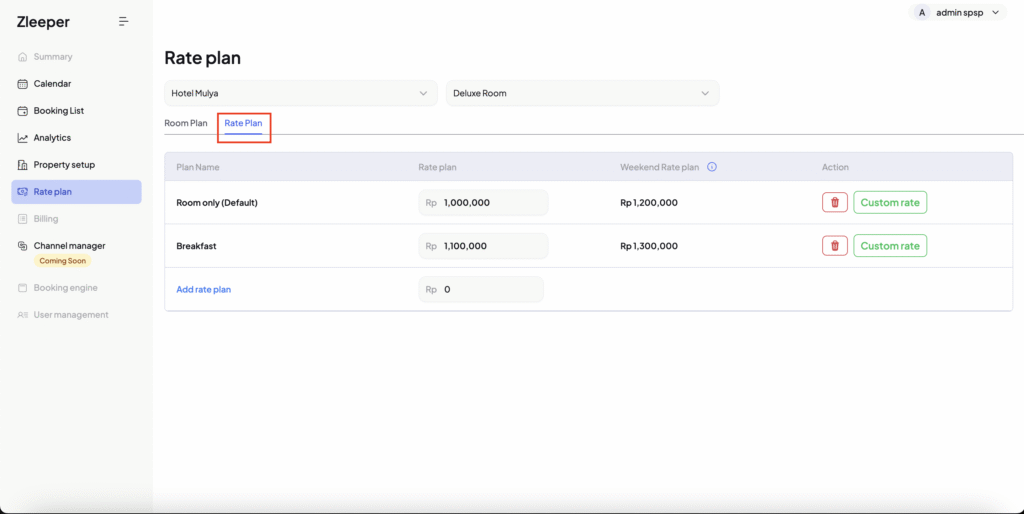
Step 1 – Create “Room Only (Default)” Rate Plan
The first rate plan you must create is:
👉 Room Only (Default)
This rate should match the base rate you want to sell.
Once created:
- This becomes your main pricing structure
- All additional rate plans will calculate from here
How Weekend Rate is Calculated in Rate Plan
Zleeper automatically adjusts your weekend price when you create a new rate plan.
You do not need to calculate anything manually.
How It Works:
Let’s say your original Room Plan pricing is:
Weekday (Base Rate): $10
Weekend Rate: $13
Now you create a new Rate Plan and set the weekday price to:
$15
The new price is $5 higher than the original $10.
Zleeper will automatically add that same $5 difference to the weekend price.
So:
$13 + $5 = $18
Your new weekend price becomes $18.
Why This Is Important
Zleeper keeps the same price difference between weekday and weekend automatically.
This means:
- You don’t need to manually calculate weekend prices
- Your pricing stays consistent across all rate plans
- All OTAs and direct bookings stay perfectly synchronized
- You avoid pricing conflicts across channels
This system ensures your pricing structure remains clean, logical, and professional.
Custom Rate – Adjust Price for Specific Dates
Custom Rate allows you to override your pricing for specific dates.
This is useful for:
- Public holidays
- Peak season
- Events
- High demand periods
How to Use Custom Rate
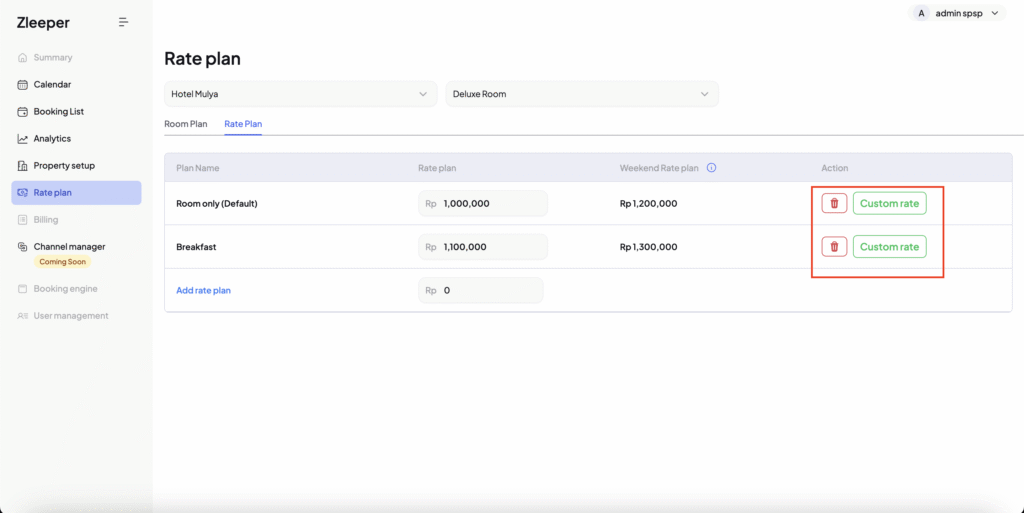
- Click Custom rate
- A popup will appear
- Select date range
- Enter new price
- Click Save custom rates
The changes will instantly sync across:
- Online travel agents
- Direct bookings
- Offline channels
Custom Rate – Stop Sell Function
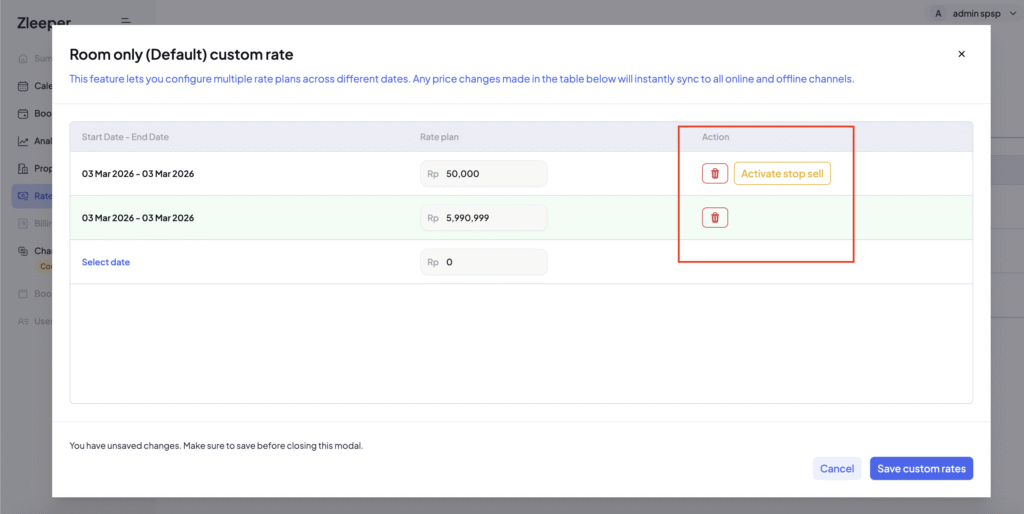
Sometimes you don’t want to sell a specific rate plan due to many possible reasons.
Example:
- No breakfast staff available
- Kitchen maintenance
- Service temporarily unavailable
Instead of deleting the rate plan, you can activate Stop Sell during a period of time.
How to Activate Stop Sell
- Click Custom rate
- Select the date and set the price
- Click “Save custom rate” button. This means, you need to save a rate first to be able to do Stop Sell.
- You will see Activate stop sell button on the table. Click that button.
- Confirm activation
Once activated:
- That rate plan will not be available
- It will not be sold anywhere (OTA + direct)
To reactivate:
- Click the blue button “Stop sell is active”
- Click Deactivate
Your rate plan becomes available again.
This gives you full control without deleting your setup.
Delete Rate Plan
If you no longer need a rate plan:
- Click the red trash icon
- Click Update rate plan
Be careful:
Deleting rate plans may affect reporting and channel mapping.
It is often safer to use Stop Sell instead of deleting.
Best Practice Strategy for Smart Revenue Setup
Here is a recommended structure:
Room Plan:
- Set realistic base rate
- Adjust weekend pricing properly
Rate Plans:
- Room Only (Default)
- Breakfast Included
- Dinner Included
- Non-refundable
- Promotional Rate
Custom Rate:
- Increase during peak season
- Stop sell when service unavailable
This structure allows you to:
- Increase average daily rate (ADR)
- Improve revenue per available room (RevPAR)
- Offer upsell opportunities
- Maintain clean inventory control
Room Types control your inventory while Rate Plans control your pricing, so never duplicate room types just to change prices—always use Rate Plans to prevent overbooking, maintain clean reporting, ensure proper channel manager sync, and keep a professional pricing structure.